Important things to know about using fragrance oil

There are some important things to know to protect yourself, your family, and your workspace, when it comes to using fragrance oil.  We want to be sure you are armed with the knowledge you need to use fragrance oils responsibly.

girl in latex gloves shows a heart shape.

How can I protect myself while using fragrance oils?

  • Use fragrance oils in a well-ventilated area. You can create ventilation by installing a vent in your work area, opening windows, and using fans to circulate the air.
  • Avoid prolonged exposure to fragrance fumes.  Consider wearing a face mask to reduce your exposure.
  • Wear gloves when working with fragrance oils to avoid skin contact.  Wash hands and any other areas of exposure thoroughly with warm water and soap after any accidental contact.
  • Wear safety glasses or eye protection when working with fragrance oils.
  • When possible, keep pets away from work areas where you are using fragrance oils.

How can I protect my workspace/home?

Again, it is important to use ventilation if you are working with fragrance oils at home.  When possible, separate your work and living space until the majority of the scent has dissipated.  An example of this might be closing doors to bedrooms at night after making candles in the kitchen.

Fragrance oils and essential oils can damage surfaces if drips or spills occur.  Protect your work surfaces to avoid damages countertops, stoves, carpets, flooring, etc.

Just like any other oil, it can be difficult to remove fragrance oil from carpet, clothing, furniture, or curtains.  We find the best way to remove fragrance oil from fabric is to spot treat the stain with a liquid soap before washing. Avoid drying the fabric until the stain is completely removed. Several wash cycles may be necessary.

**We are happy to provide the SDS sheet for any of our fragrances.  Please email info@communitycandlesupply.com for any SDS, or with any questions regarding our products.  The IFRA document for each fragrance can be found for each of our fragrances by clicking on the “IFRA” tab under the product description section of the listing.

TLC for “Winter Feet”, Make a Menthol Foot Scrub

Image of soothing foot massage

If you are like me, your feet take a lot of abuse.  We spend our days walking, standing, running, and wearing crazy shoes sometimes.  It is often easy to over look the importance of taking care of your feet.  According to Harvard University, a foot massage can “improve circulation, stimulate muscles, reduce tension, and often reduce pain.”

So why not pamper yourself or someone you love with a soothing foot massage with this DIY scrub?  This also makes a fabulous, handmade gift.

Relax with a soothing foot massage.

You will need:  Heat source such as stove or hotplate, metal pot, digital scale,  medium mixing bowl, stick blender (preferred) or wire whisk, a silicone spatula is also helpful, and a medium sized glass vessel for weighing/measuring. Best practices for manufacturing include wearing an apron, hairnet, gloves, and mask,  and maintaining a clean work space.

Directions:

To metal pot, add emulsifying wax, stearic acid, Cocoa Butter, and Shea Butter.  Melt over low heat on stove top or in double boiler until completed melted.

In a separate bowl, combine sweet almond oil, apricot kernal oil, and castor oil and blend.

Remove butters and wax mixture from heat when fully melted, and add menthol crystals. They will dissolve in the warm liquid. Stir to fully incorporate the menthol.

Pour liquid oils into wax mixture. Using a hand mixer, stick blender, or wire whisk, mix until thick.  Let mixture cool completely.

Begin to mix slowly while adding salt (or sugar). Continue until all salt or sugar has been incorporated.

Add preservative and Walnut Shell Powder. Mix for approximately 5 minutes until scrub is thick and fluffy.

Fill jars, and label product with ingredients.

Note: Be sure to thoroughly rinse/wipe product from your feet before standing to prevent slipping.

Using Liquid Candle Dyes

Liquid dyes are capable of providing rich, vibrant colors in most waxes.  However, there are some things to learn before beginning to use these dyes.

Storage: We recommend storing your dyes inside a box or container of some sort.  Although we package our dyes in quality HDPE bottles, over extended periods of time plastics can degrade and become compromised.  If this happens, leakage can occur from bottles and containers, so it is helpful to store you dyes within a secondary box or container in case this happens.  Be sure to store you dyes upright to avoid leakage through the lids.

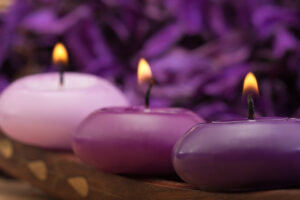
Candles in different shades of purple
three burning purple toned candles with purple background

Preparation: Liquid candle dyes are extremely concentrated.  As such, it is important to protect all surfaces from spills and stains when using liquid dyes.  We recommend covering your work surface with a sheet of cardboard, thick paper or multiple layers of paper, or even working over a metal baking pan that can catch drips and spills. In addition, gloves should be worn to protect your skin from staining, and old clothes or an apron can be worn to protect clothing.  It can also be helpful to wear old shoes (ask us how we know!).

For a medium to dark shade, you will need to use roughly 0.05% dye, which is roughly 7-8 drops per pound of wax.  **You can also calculate this mathematically like this:

  • Total batch size X 0.005=amount of liquid dye to be used. (Medium Shade)

For darker shades, try using 0.1% dye, or multiply the batch size by 0.01.

For paler shades, try using 0.005%, or multiply the batch size by 0.0005.

Measurement conversions:

1 oz=28 grams

1 pound = 454 grams=16 ounces

1 Tbsp=15 grams=roughly ½ ounce

1 Tsp=5 grams=roughly 1/5 ounce

½ Tsp=roughly 2 grams

¼ Tsp=roughly 1 gram

One drop=roughly 0.03 gram

1 gram=roughly 33 drops

How Much Fragrance is Too Much? The IFRA

Spa image with oils in glass bottles

Some articles on the internet give set recipes or directions for making products, which is really great for beginners!  However, once you start altering your process, many new makers get confused about how to determine the amount of fragrance they can use in a product.   The goal of this article is to help our customers more fully understand how much fragrance can be safely used in a given product. 

Luckily, the International Fragrance Association has established standards for fragrance manufacturers to use in order to determine and disclose safe usage rates for end users.  As the end user, it is your responsibility to abide by these guidelines in your products in order to protect yourself, and your customers from harm.  Community Candle Supply posts the IFRA document for each fragrance under the product description for each fragrance we offer for sale. You can find this document by clicking on the “IFRA Data” tab in the product description.

In that document,  different types of products are broken down by type and a maximum usage rate is listed for each category.  The maximum safe usage is NOT necessarily the amount of fragrance you should use for your formulation, it simply the most of that fragrance that has been determined safe for those products  based on the components of the fragrance.  As the maker, it is up to you to research and test your product formulations to determine the desired amount of fragrance that is within the limits provided on the IFRA.  If you want to use more fragrance than the maximum amount on the IFRA, you need to find a different version of the fragrance, or you risk harming your customers.

Spa image with oils in glass bottles
It is important to conduct proper testing prior to selling your products.

Candles:

Most candle makers use between 6-9% fragrance for their candles, although some makers use as much as 12% fragrance. So here is an example of the formula I use to calculate the fragrance for a batch of 5 candles, where I am using 5 ounces of wax per candle and want a 7% fragrance load.

  • {# oz of wax} X {percentage of fragrance in decimals} = amount of fragrance per candle

Plugging in the numbers: 5 X 0.07 = 0.35 oz per candle.  Since I am making 5 candles, I would then multiply this times 5 to determine the amount of fragrance needed for my batch.

  • Batch: 5 X 0.35 = 1.75 oz fragrance for the whole batch of 25 oz of wax.

Soap Making:

Most lye calculators include a fragrance calculator, so when plugging your oils in to the lye calculator you can also plug  your desired fragrance level in to determine the amount of fragrance needed.  The important thing to do is to be sure that the percentage of fragrance you intend to use is allowed by the IFRA. Remember, you can find the IFRA on our site on the “IFRA Data” tab of the product description.  Other vendors may post a fragrance calculator, or you may have to request the IRFRA.  If your vendor cannot provide an IFRA, you might want to consider using a different vendor.  **Again, if your desired usage rate is higher than the IFRA rate, choose another fragrance for your project.

You can find more information about the International Fragrance Association and IFRA on their website which is here: https://ifrafragrance.org/home.

Candle Troubleshooting

Candle Troubleshooting Tips

Wet Spots:  Shrinkage & air bubbles that occur as the wax is cooling in  container causing the wax to pull away from the glassware. Possible Causes: Humidity, raising or lowering the pour temp, environmental temperatures, pouring too quickly, cooling candles are placed too close together & hold heat unevenly. Possible Solutions: Pre-heat your glassware prior to pouring, pour wax very slowly into container, tap the glassware gently after pouring to release any air bubbles, a room temp of 70-72° is best when pouring, place freshly poured candles about 4″ apart when cooling to avoid extra heat being held in on sides.

Candle wax is not burning evenly all of the way down: Possible Causes: Wick may not be centered, wick may be too small, your wax may be too hard (too high of a melt point). Candle may be in a draft, under a fan, near a vent. Possible Solutions:  Use a device to help center wick such as wick bar, or other centering tool. Try using a softer, lower melt point wax  or try using a larger wick. It is very important to choose the right size wick for the diameter of each container you use. Keep away from drafts.

Tunneling: Candle has “tunneling” effect (leaving wax on the
sides of container candles. Possible Causes: Wick size is not large enough for your wax, container, fragrance, dye combination. Dark or highly-fragranced candles often need a larger wick. Possible Solutions:  You may need to go up one or two sizes in the wick series you are using. If you have a container with varying widths, measure the widest & narrowest & use an average for the
diameter.

 Mushrooming: Candle wick is “mushrooming” or has a carbon buildup at the end of the wick. Possible Causes:  Wick is too large for the container, wick has not been properly trimmed, using a higher amount of fragrance oil in your candles may cause a “fragrance mushroom”. Possible Solutions: Try using a smaller wick for your container, burn candles no longer than 2-3 hrs at a time without blowing out & trimming the wick to 1/4″.

Frosting: “White Frosting” in Soy. This is caused by tiny crystal growth that forms on the top & sides of the wax. It is a natural byproduct of a natural  wax, it does not affect the burn & is very common. Possible Causes: Pouring wax too quickly into containers, pouring wax at too high of a temp, candles cooled too quickly (wax in container), wax blended/stirred too vigorously prior to pouring, environmental temperatures. Possible Solutions: Mix/stir wax slowly, preheat glassware in a warm oven to a max of 100°, pour your wax at a lower temp to help reduce the crystal formation, cool at room temperature & keep out of drafts, try making non-colored soy candles to make frosting less noticeable, elevate your candles on a wire rack for even cooling.

Fragrance leaching: Fragrance oil is “leaching” through top of candle. Excessive soot and/or smoking. Possible Cause: Overloading a wax with a higher fragrance percentage than recommended can cause oil to seep out or leach” as it is not able to hold it. Too much fragrance load can also lead to soot, smoking, wick drowning out. Possible Solutions: Reduce the amount of fragrance oil used. Always research & test your wax to find out how much fragrance oil it can retain.

Little or No Scent Throw: Scent is less than expected when candle is burning. Possible Causes: Too small amount of fragrance oil used, poor quality of fragrance oil, adding fragrance at too low or too high temperature, not letting your candles cure after pouring, type of wax used, improper wick or wick sizing issue. **Note: Recommended temp for adding FO is 185° to ensure that it binds & mixes completely with the melted wax. As soon as you remove the melted wax from the heat source, it will begin to cool. Adding FO also continues the cooling process. If you add FO when the wax has cooled below 180°, you risk the possibility of poor cold and/or hot throw. Some internet bloggers recommend adding fragrance at or below its flash point. Flash point is the temperature at which the oil will ignite if introduced to a spark or flame. There is no safety concern whatsoever in adding fragrance at higher temperatures than the listed flash point. Possible Solutions: Add more fragrance, know the minimum & maximum percentages that are recommended for your wax, use high-quality fragrances, try & test different waxes (paraffin is well-known for it’s excellent scent throw, try blending a little in if using soy), be sure to use oils designed for candle-making, always make sure to have properly sized wicks for each container you use to ensure a great melt pool, let your candles cure before test burning (24 hrs minimum, 1-2 weeks recommended.)

Unstable or Large Flame: Candle flame is too high, wick is flickering continuously & jumping. Possible Causes: Wick is too large for your container. Wick needs to be trimmed. Possible Solutions: Always measure & test your wicks to ensure they are the correct size for the diameter of your container, keep wicks properly trimmed at 1/8 to 1/4 inches before burning & after long periods of burning (2-3 hours).

Wick Extinguishing: Candle wick is drowning out, won’t stay lit. Possible Causes: Too heavy use of additives (fragrance oil, dye, etc.), wick is too small for container.  Possible Solutions: Use the right size wick for your container, always use proper amount of additives (know the minimum & maximum that your wax will allow.

Rough Surfaces/Cracking: Candles have an uneven, rough surface or small air bubbles which lead to small holes, cracking, and/or jump lines. Possible Causes: Stirring too vigorously, water somehow got into the wax, your candles cooled too fast, candles were poured at too cool of a temp. Possible Solutions: Avoid over-stirring, pour at a slightly hotter (+5 degrees) temperature, avoid water or moisture getting into your solid, flake & melted wax,  heat your containers to 90-100° in a warm oven, pour more slowly, use a heat gun on low for any imperfections (you can also use it to preheat or warm your containers before pouring), cool your candles at room temp (avoid extremely hot or cold rooms). **Note: One overlooked source of moisture is humidity. If you reside in a humid area and have a recurring issue with this, consider storing your wax in a room with a dehumidifier.

Odd Scent: Candles have a “fuel-burning” type smell. Possible Cause: Wick is either too large or too small, candles have not cured long enough, “citrus” and/or “mint” fragrance notes seem to be the most common issues for some candle makers, too heavy fragrance load. Possible Solutions: Try either going down or up a wick size with these certain fragrance oils, let candles cure for a minimum of 24 hrs; 1 week is usually best, try a smaller percentage load of fragrance oil, some candle-makers feel that adding a very small amount of a ‘creamy vanilla” type fragrance oil helps to eliminate this problem.

**Disclaimer: We have taken every effort to ensure that this guide is as accurate as possible. Community Candle Supply is providing this  information to be used a guide only & this does not substitute for proper testing & experimentation.  We cannot guarantee or take responsibility for any errors or omissions in this guide. We are also not responsible for any actions or outcomes that are a consequence of using the above information. Thank you for your understanding!