Candle Troubleshooting Tips
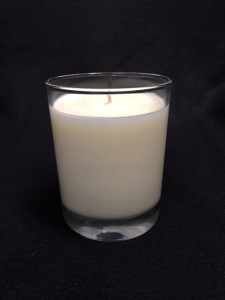
Wet Spots: Shrinkage & air bubbles that occur as the wax is cooling in container causing the wax to pull away from the glassware. Possible Causes: Humidity, raising or lowering the pour temp, environmental temperatures, pouring too quickly, cooling candles are placed too close together & hold heat unevenly. Possible Solutions: Pre-heat your glassware prior to pouring, pour wax very slowly into container, tap the glassware gently after pouring to release any air bubbles, a room temp of 70-72° is best when pouring, place freshly poured candles about 4″ apart when cooling to avoid extra heat being held in on sides.
Candle wax is not burning evenly all of the way down: Possible Causes: Wick may not be centered, wick may be too small, your wax may be too hard (too high of a melt point). Candle may be in a draft, under a fan, near a vent. Possible Solutions: Use a device to help center wick such as wick bar, or other centering tool. Try using a softer, lower melt point wax or try using a larger wick. It is very important to choose the right size wick for the diameter of each container you use. Keep away from drafts.
Tunneling: Candle has “tunneling” effect (leaving wax on the
sides of container candles. Possible Causes: Wick size is not large enough for your wax, container, fragrance, dye combination. Dark or highly-fragranced candles often need a larger wick. Possible Solutions: You may need to go up one or two sizes in the wick series you are using. If you have a container with varying widths, measure the widest & narrowest & use an average for the
diameter.
Mushrooming: Candle wick is “mushrooming” or has a carbon buildup at the end of the wick. Possible Causes: Wick is too large for the container, wick has not been properly trimmed, using a higher amount of fragrance oil in your candles may cause a “fragrance mushroom”. Possible Solutions: Try using a smaller wick for your container, burn candles no longer than 2-3 hrs at a time without blowing out & trimming the wick to 1/4″.
Frosting: “White Frosting” in Soy. This is caused by tiny crystal growth that forms on the top & sides of the wax. It is a natural byproduct of a natural wax, it does not affect the burn & is very common. Possible Causes: Pouring wax too quickly into containers, pouring wax at too high of a temp, candles cooled too quickly (wax in container), wax blended/stirred too vigorously prior to pouring, environmental temperatures. Possible Solutions: Mix/stir wax slowly, preheat glassware in a warm oven to a max of 100°, pour your wax at a lower temp to help reduce the crystal formation, cool at room temperature & keep out of drafts, try making non-colored soy candles to make frosting less noticeable, elevate your candles on a wire rack for even cooling.
Fragrance leaching: Fragrance oil is “leaching” through top of candle. Excessive soot and/or smoking. Possible Cause: Overloading a wax with a higher fragrance percentage than recommended can cause oil to seep out or leach” as it is not able to hold it. Too much fragrance load can also lead to soot, smoking, wick drowning out. Possible Solutions: Reduce the amount of fragrance oil used. Always research & test your wax to find out how much fragrance oil it can retain.
Little or No Scent Throw: Scent is less than expected when candle is burning. Possible Causes: Too small amount of fragrance oil used, poor quality of fragrance oil, adding fragrance at too low or too high temperature, not letting your candles cure after pouring, type of wax used, improper wick or wick sizing issue. **Note: Recommended temp for adding FO is 185° to ensure that it binds & mixes completely with the melted wax. As soon as you remove the melted wax from the heat source, it will begin to cool. Adding FO also continues the cooling process. If you add FO when the wax has cooled below 180°, you risk the possibility of poor cold and/or hot throw. Some internet bloggers recommend adding fragrance at or below its flash point. Flash point is the temperature at which the oil will ignite if introduced to a spark or flame. There is no safety concern whatsoever in adding fragrance at higher temperatures than the listed flash point. Possible Solutions: Add more fragrance, know the minimum & maximum percentages that are recommended for your wax, use high-quality fragrances, try & test different waxes (paraffin is well-known for it’s excellent scent throw, try blending a little in if using soy), be sure to use oils designed for candle-making, always make sure to have properly sized wicks for each container you use to ensure a great melt pool, let your candles cure before test burning (24 hrs minimum, 1-2 weeks recommended.)
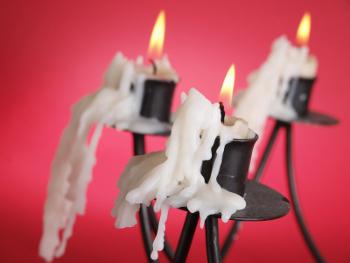
Unstable or Large Flame: Candle flame is too high, wick is flickering continuously & jumping. Possible Causes: Wick is too large for your container. Wick needs to be trimmed. Possible Solutions: Always measure & test your wicks to ensure they are the correct size for the diameter of your container, keep wicks properly trimmed at 1/8 to 1/4 inches before burning & after long periods of burning (2-3 hours).
Wick Extinguishing: Candle wick is drowning out, won’t stay lit. Possible Causes: Too heavy use of additives (fragrance oil, dye, etc.), wick is too small for container. Possible Solutions: Use the right size wick for your container, always use proper amount of additives (know the minimum & maximum that your wax will allow.
Rough Surfaces/Cracking: Candles have an uneven, rough surface or small air bubbles which lead to small holes, cracking, and/or jump lines. Possible Causes: Stirring too vigorously, water somehow got into the wax, your candles cooled too fast, candles were poured at too cool of a temp. Possible Solutions: Avoid over-stirring, pour at a slightly hotter (+5 degrees) temperature, avoid water or moisture getting into your solid, flake & melted wax, heat your containers to 90-100° in a warm oven, pour more slowly, use a heat gun on low for any imperfections (you can also use it to preheat or warm your containers before pouring), cool your candles at room temp (avoid extremely hot or cold rooms). **Note: One overlooked source of moisture is humidity. If you reside in a humid area and have a recurring issue with this, consider storing your wax in a room with a dehumidifier.
Odd Scent: Candles have a “fuel-burning” type smell. Possible Cause: Wick is either too large or too small, candles have not cured long enough, “citrus” and/or “mint” fragrance notes seem to be the most common issues for some candle makers, too heavy fragrance load. Possible Solutions: Try either going down or up a wick size with these certain fragrance oils, let candles cure for a minimum of 24 hrs; 1 week is usually best, try a smaller percentage load of fragrance oil, some candle-makers feel that adding a very small amount of a ‘creamy vanilla” type fragrance oil helps to eliminate this problem.
**Disclaimer: We have taken every effort to ensure that this guide is as accurate as possible. Community Candle Supply is providing this information to be used a guide only & this does not substitute for proper testing & experimentation. We cannot guarantee or take responsibility for any errors or omissions in this guide. We are also not responsible for any actions or outcomes that are a consequence of using the above information. Thank you for your understanding!